Are you looking for how to set up bathtub tiles? If yes then you are at the right place in this article we will discuss how to set up bathtub tiles. You spend time in your bathroom every day, so why not make it beautiful? Installing tile around the shower or bathtub can beautify your bathroom with a more sophisticated look and offer the opportunity to personalize the space with your personal style. Choose a bold and colorful tile that will turn heads or go for classic charm with a white subway tile treatment.
Here Is How to Set Up Bathtub Tiles
We’ll show you how to tile a bathtub surround, including tips for a clean look and a waterproof finish. Expect to spend around 20 minutes per square foot preparing and laying the tile, and make sure you’re comfortable using hand tools, a cordless drill, and trowels.
Depending on the size of your bathtub and your level of experience, the project can be done in a few days. Follow these step-by-step instructions to learn how to set up bathtub tiles.
Steps Of How to Set Up Bathtub Tiles
- Take a measurement from the top of the tub in the corner. Mark the height of the tile on the wall. Repeat the process on the other side of the corner of the tub. The mosaics are available in different geometric shapes, square, rectangular, etc. If you have rectangular tiles, decide which measurement you will take as height.
- Join one mark to another with a chalk line. Measure the space between the tub and the line marked in different places to check if the space is always the same or not. If the gap varies, select the shortest size. This measurement will be the size of the tiles to be cut.
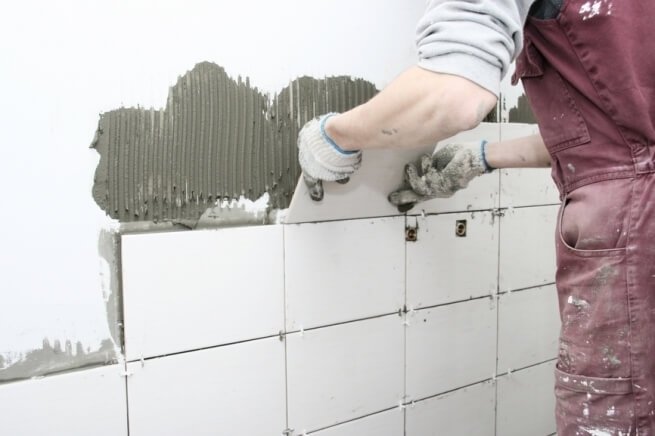
- Find the center of the wall and mark that point. Set a carpenter’s level vertically. Stretch a line along the carpenter’s level. Take a wet saw and cut the first row of tiles with it. Before applying the putty to the wall, read the manual carefully and strictly follow the instructions.
- Place the first tile in the center along the marked line. Take it as a guide card; add tiles on both sides of the first tile. You may need to cut the tiles for the corners. Continue to properly add tiles and putty to the walls.
- Also, cover the opposite walls with tiles. In the end, use the rounded tip tiles to finish the last column.
- Remove the tub spout by turning it counterclockwise. Remove the covers to locate the screws holding the handles. Take a screwdriver and loosen the screws and finally remove the handles. Follow the same procedure to remove the shower head.
- Lay the tiles on the wall. You have to drill the tiles so that they can be fixed on the accessories. Measure the size of the pipes and choose a hole saw of the appropriate size to drill a hole in the tiles. Install the tiles and allow the caulking to harden properly before proceeding with grouting.
- Now apply the grout to the tile covering in a zigzag pattern with a trowel. Continue by removing excess grout from the surface of the tile with a soft, damp sponge. When finished installing the tiles, apply the glaze to give the tiles a sheen. Replace the accessories later.
Faqs | How To Set Up Bathtub Tiles
Where do you start when you tile a bathtub?
Mark the starting position. When tiling a tub, it’s best to start in the center of the tub (lengthwise) and work your way out in both directions. Use a tape measure to estimate how many tiles, including joints, it will take to reach the corners.
How do you prepare a wall for tiling around a bathtub?
Preparing the bathtub or shower frame: Apply a layer of 1/2″ thick concrete backer board to the wall studs. Secure seams and corners with fiberglass tape. Apply thin grip adhesive to fiberglass tape and allow to dry. Roll a waterproofing sealant on the walls and allow the sealant to dry.
Do you leave space between the bathtub and the tile?
Bathtubs, believe it or not, expand when filled with water. Leaving a 1/16″ gap between the tub and tile will prevent the tile from cracking as the tub expands. Also, a 1/16″ gap allows the caulk to properly fill the gap and waterproof the transition between the tile and the tub. or shower.
Where do you go the tiles of a bathtub?
Plan to extend the tile 2 to 3 inches beyond the tub and leave at least half a tile along the wall if possible. Do not stop the tiles even with the end of the bathtub. This leaves the walls along the front of the tub vulnerable to water damage and doesn’t look as finished as the tiles that span the floor.
Also, read this: HOW TO CLEAN AND POLISH HARDWOOD FLOORS | BEST GUIDE, 2022